This is a brilliant project to give your sewing machine some exercise making a striking quited square with any type of material, not just prime cotton poplin.
This is my problem with paper piecing: patchwork was invented as a way to use up fabric scraps, left-overs from other projects and decently preserved bits from discarded clothing. You were not meant to have to buy brand new expensive material just so you could cut it up into tiny bits! But with paper piecing, the fabrics in your design have to be of identical weight and weave, they may not fray, they should iron easily, lie flat, not shrink or stretch in the wash, etcetera, etcetera, in a word, they have to be of prime quality cotton poplin, or you are doomed.
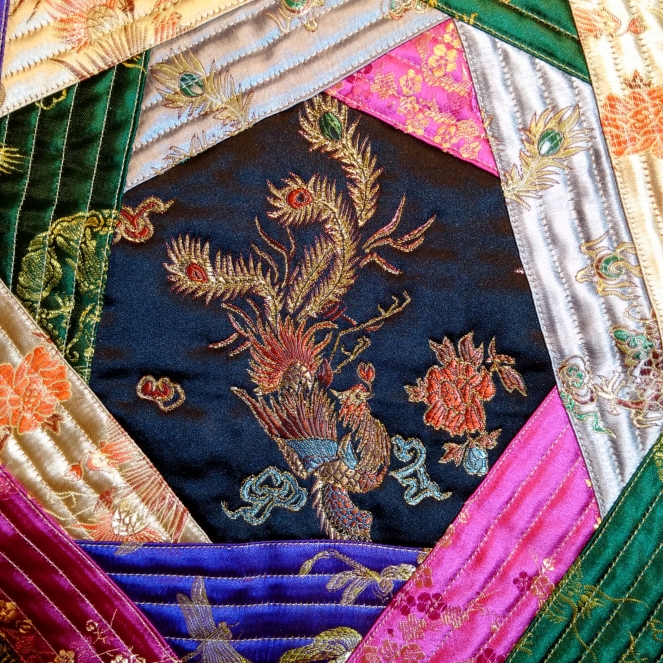
And yet there is a world of other fabrics out there, and I for one really like Chinese brocade. Vibrant colours, delicate woven designs, but not something I would use for every day clothing because it’s heavy satin. So the only application for my lovely brocade so far was sitting on a shelf looking pretty. 😦
And then I discovered this quilt-as-you-go flip and stitch technique in a magazine (Love Patchwork & Quilting, issue 20).
This could be made with any fabric, becauseall it required was strips of material of equal width. You could play with texture and colour, or use jelly rolls for a completely different effect. You did not have to stick to hexagons either – this would work with any shape in the centre, probably even an asymmetric one. Absolutely brilliant! Finally there was an application for my Chinese brocade!
I made two squares so far, one with a hexagon and one with a heptagon in the centre (a six-sided and a seven-sided shape with sides of equal length).
This was so much fun! I’ll show you how to make your own.
Drawing a shape for the centre
How do you draw a perfect heptagon? Easy. You need a sheet of paper, a compass (for drawing circles, not showing the North), a pencil and a geometric triangle with angles (remember those from school?).
Mark the centre of your shape and draw a circle. Your shape will be drawn inside it, so if you are planning to use a particular motif on a fabric, make sure your circle is big enough for it. Remember that the shape will be smaller than the circle, so make it big enough. Also, don’t forget seam allowances.
Decide how many sides your shape should have. Say, it’s 7 sides. Well, a circle has 360 degrees, so each of the sectors will have 360/7 = 51.4 degrees. We can now mark the sectors.
First, put a mark anywhere on the circle, this is where you start. Then put your triangle with the zero to the centre of the circle and with the tip along your mark. Mark off 51.4 degrees along the side of the triange.
Connect the centre of the circle and the 51.4 degree mark with a line. Where this line crosses the circle, is your second mark.
Now put your triangle with the zero to the centre and with the tip along the second mark. This is exactly what you’ve done before, but use the second mark instead of the first mark. Mark off 51.4 degrees again, and draw a line between this new mark and the centre. Where it crosses the circle, is your third mark.
Continue this process until you’ve got the sixths mark, you will notice that the circle has now been divided into seven equal parts.
Connect each mark on the circle with the next, and you have your perfect heptagon.
Cutting the material
Decide how big your quilt square should be. I made mine 60cm x 60cm. Cut a piece of backing and batting in this size.
Cut out the fabric for the centre using your paper template. Cut strips of material of equal width or use a jelly roll for the spiral. I cut strips of brocade 7cm wide. Brocade frays easily, so I was planning on wide seams, 1cm each. This would give me 5cm wide strips in the finished square.
I don’t really know how many strips you need to cut, I didn’t calculate that in advance. That’s the beauty of this method: you cut some strips and you use them as you go, and if you run out, you cut some more. No planning, no panic. :-)
Starting to sew
Put your batting on top of your backing and work on the batting side from now on. All stitching is done through all the layers.
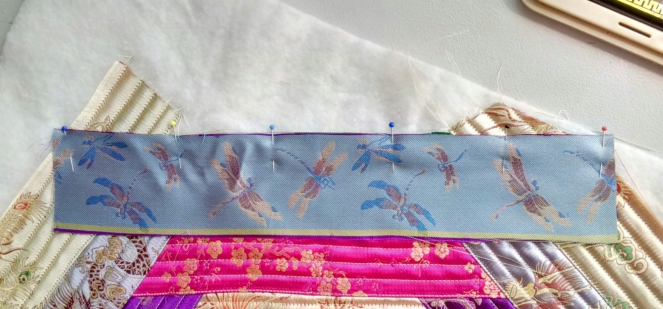
Pin your central heptagon to the centre of your square. Actually, you could pin it anywhere if you wanted your design to be off-centre. Ooh – the possibilities!
The first strip is going to look a bit different in the finished design. Pick a side of the heptagon and pin it there!
The left edge of your strip should extend a bit beyond the side of the heptagon. Cut the right side of the strip to match.
Stitch the strip in place.
Flip it with the right side up and quilt. This could be a perfect opportunity to use those fancy stitches on your sewing machine instead of the simple straight stitch. Use your imagination!
To keep the reverse neat, pull up all thread ends to the right side. They will be hidden and secured by the strips that come later on.
The rest of the first level
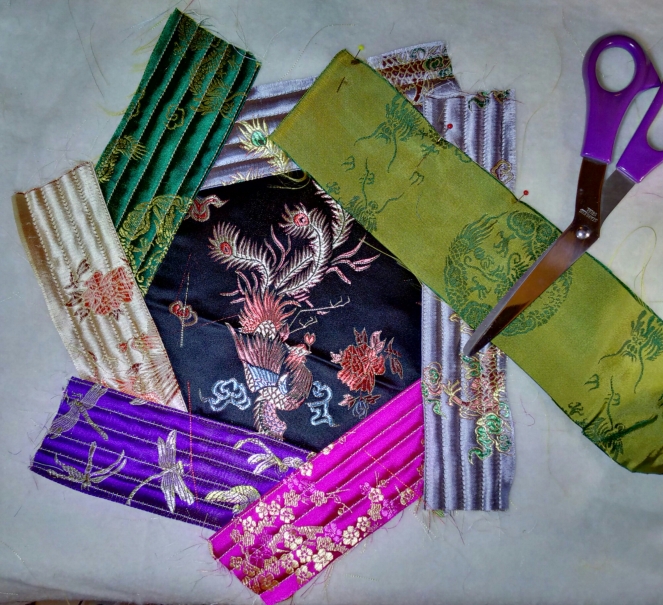
The second strip goes along the side of the heptagon to the left of the one you’ve just done. Put the strip all the way across the previous one.
Cut, stitch, flip and quilt like before. Don’t forget to pull up all thread ends to the right side.
Continue in this way until you arrive at the last remaining side.
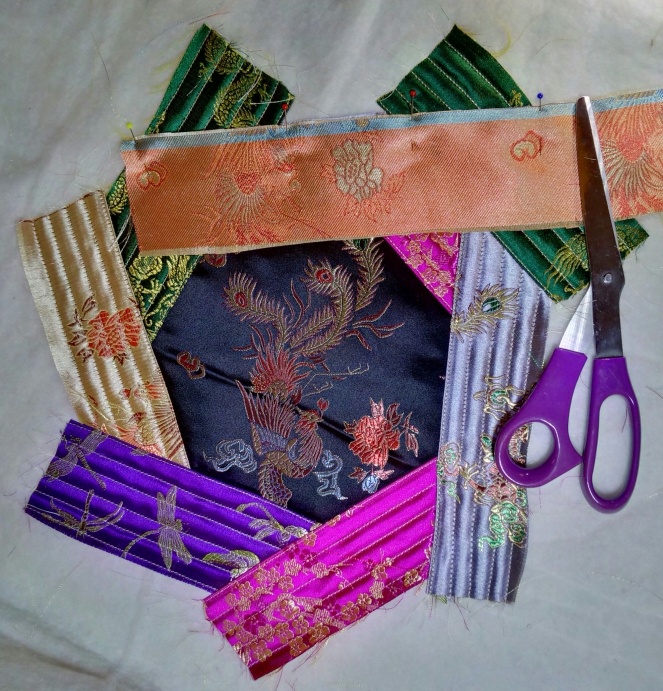
The next strip goes across the final side and the two previously quilted strips on either side of it.
Cut, stitch, flip and quilt. Pull up the thread ends.
The second level and on
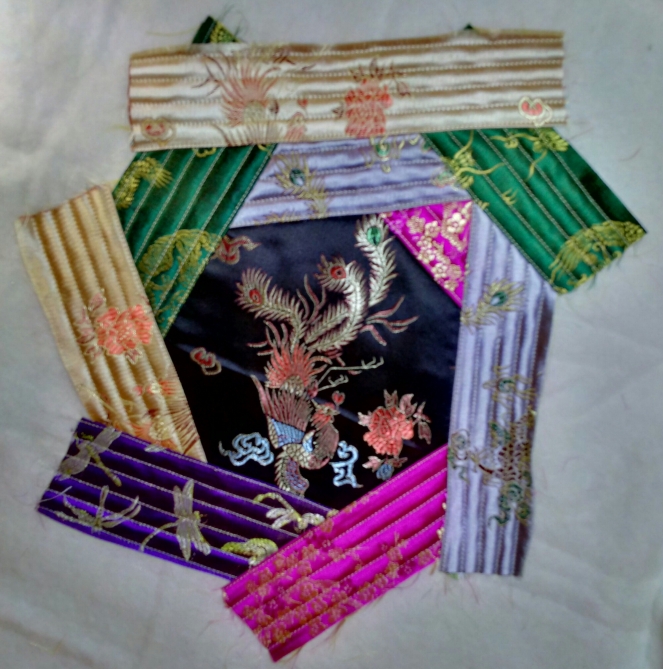
The next strip goes over the little triangle which was your very first strip quilted.
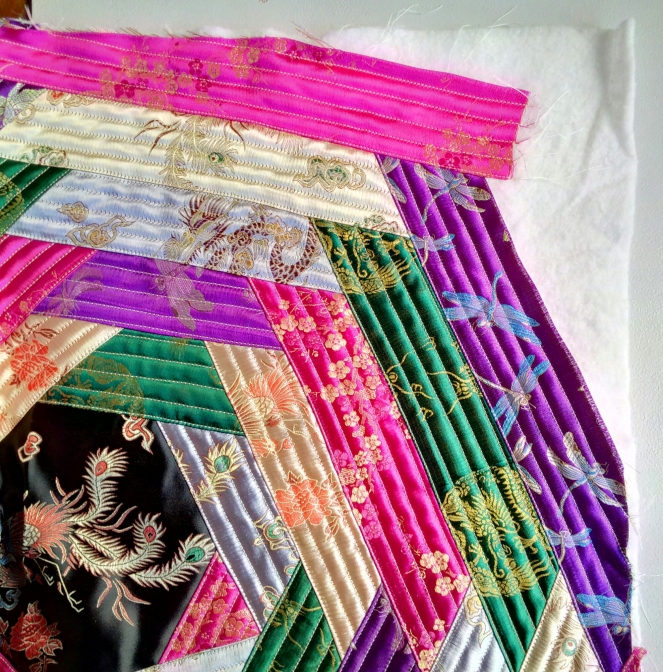
Continue similarly to the last two strips: each following strip is laid across the top of the strip on the previous layer, running over the neighbouring strips on either side.
Continue this way until you get to the edges of your quilt square.
Filling in the corners
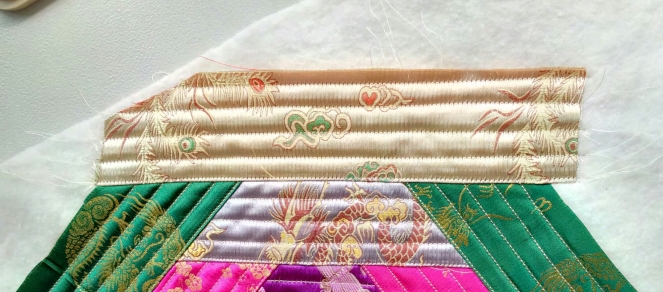
Also in the corners you continue the same way as before. But when you flip the strip, trim it along the edge of the square, then quilt what’s left of it.
The next strip goes across the trimmed edge. Not to worry, simply lay the strip straight and let it extend as far as there is quilting underneath. Cut a little beyond that to allow for the seam.
Flip and trim along the edge again.
Continue going around the spiral until you hit the edge of your square again. In my quilt, it’s already on the next strip. Just procede as before.
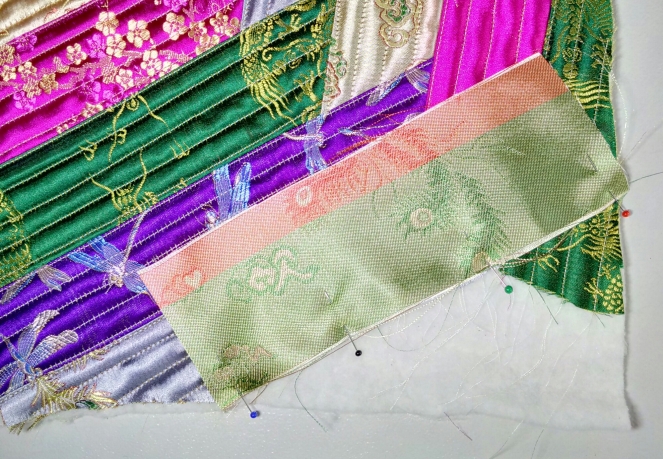
Now we go back and forth doing strips in the corner. Again, nothing new here, just alternate: left strip, right strip, left, right, etc.
Finally you are left with just one strip spanning the corner.
When you flip it, look on the reverse of your square: chances are, the batting has slipped a bit beyond the backing.
That’s ok, don’t panic! Simply trim the batting and the strip along the edge of the backing, and quilt like before.
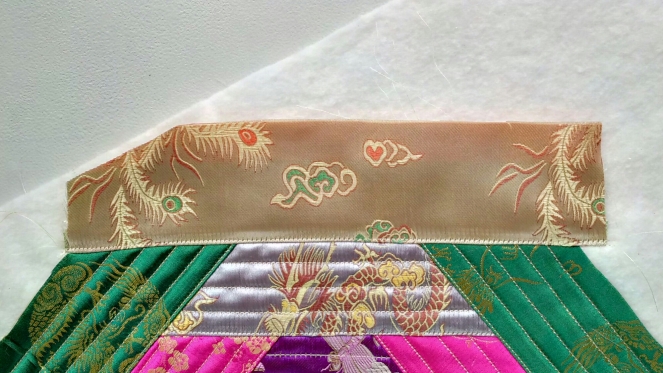
And here is your finished corner:
Finishing off
Continue in this way to fill in all the corners, and your square is all quilted!
If your central piece is rather large, it may be a good idea to quilt that along the lines of the design on the fabric. I’ve done mine with gold thread so it blends in with the design.
And there you are – your quilt square is complete! Now to figure out what to do with it…








 Buy me a coffee 🙂
This looks so much fun Elena – I so wish I had the time to devote to sewing ad trying things out – but that is definitely on the agenda for next year. Love your blog. So informative and inspirational!
(painted 7 doors today – nightmare with the light at this time of year!)
LikeLike
This was a lot of fun indeed. I needed a straight stitch project with lots of stitching to fettle my Harris Automatic. So the Rooster is done on the Harris, while the Dragon I did on a straight stitch only machine (the Japanese Lion). Comparing the two, I see no wiggling or tiny zig-zags in the Harris job, so I think its straight stitch is actually really straight! And it’s had plenty of exercise now, so the joints had a chance to de-gunk. 🙂
Good luck with those doors! 😮
LikeLike
Fantastic colours
LikeLike
Oh my goodness that fabric is delicious! Looks like your blog will be fun to look through 🙂
LikeLike
Beautiful! This is a must do on my list! Thanks for sharing and great instructions.
LikeLike
Absolutely beautiful! What a marvelous use for Chinese brocade!
LikeLike
Thank you! 🙂
LikeLiked by 1 person
You’re welcome! 🙂 It’s such a great idea for putting Chinese brocade to use! Now I’m itching to get my hands on some myself!
LikeLike