Including a look inside a motor. 😮
I have this Sew-Tric motor from 1960s that had seen very little use, but was making a horrible screeching noise.
I thought it would be a waste to throw away a perfectly good expensive motor, so I decided to open it up and see what was making the noise.
Careful: Never touch the copper wires!
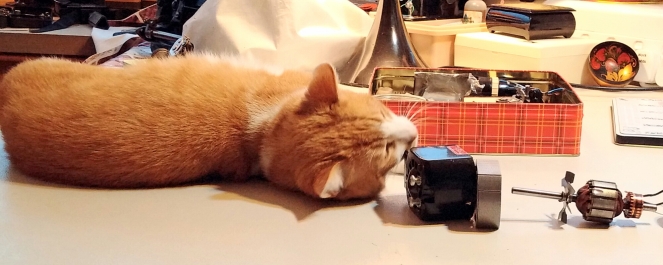
My cat is a junkie, he gets high on glue and lubricants! He gets to it so quickly, it’s scary. I can’t leave anything out, or he’ll be licking the oil off the machines or the glue off the sticky tape! Urghhh…
The source of trouble
But he wasn’t the source of the screeching. 😉 It was a small amount of rust on the rotor and the strator (the ribbed steel bits).
The fit between the two is quite tight, so that little bit of rust made enough of a protrusion to make the rotor scrape the strator, hence the noise.
So I polished it off with a bit of high grade sand paper (grade 5000).
Re-assembly
That was easy. Now for the hard bit: putting it all back together!
First of all remove carbon brushes if you haven’t done it yet. At this point they should just fall out if you shake the casing with the taped up coils.
Next, the mummified copper coils have to fit into the strator which has to fit into the casing. Fix it in place with long screws and use cable holders to keep the wires under control.
Prepare the rotor: it needs two washers on its short end, a normal one followed by a thin warped one.
Insert the rotor into the strator, the rotor’s end should fit into the hole or socket in the butt of the casing. This may require a bit of “pursuasion” to get past the taped coils.
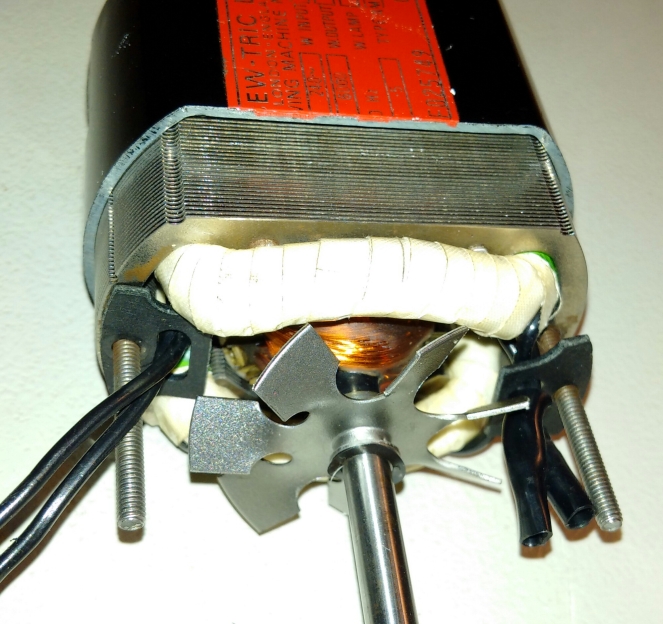
Check the wires. They should not be getting into the fan like in the photo above! Use cable ties to keep them securely away from the blades. This is a bit of a fiddle.
Rotate the rotor by the axis – it should move freely.
Place two washers onto the rotor axis like you did it for the other end.
Now put on the other half of the casing. This is tricky because you have to align four things at the same time: the two free wires have to pass through a hole going to the plug, the two long screws should fit through their respective holes, and the rotor axis should go through the hole in the butt end.
Fix the screws with nuts lightly and check that the rotor moves freely by rotating the axis. If it is stuck, you have either over-tightened the nuts, or something is interfering with the blades, in which case you need to open the case and try again.
Now insert the carbon brushes. They are basically sticks of graphite with a spring. They should be longer than 7mm, if they are too short, it’s time to get some new ones.
Stuff them in and screw on the caps.
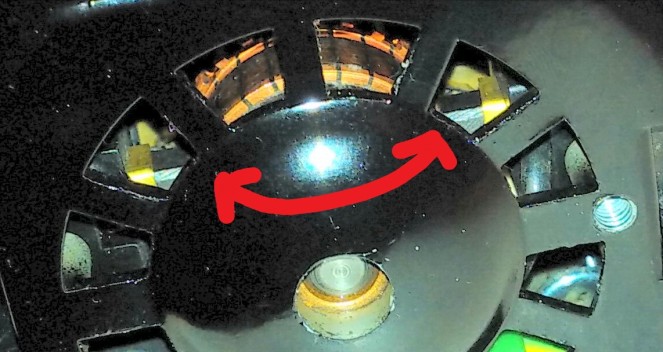
If you look through the grid on the back of the motor, you can see the carbon brushes touch the rotor ring.
Next, attach the lamp if you’ve got one.
Wiring the socket
Now for the wiring! There is a schematic for the socket embossed on the lid. Work out which is the right way up. 🙂
All you have to do now is connect the right wires to the right pins. One of the pins takes two wires, the others take one each. The earth pin is screwed onto the casing as it is metal. Note that the motor itself must not be earthed.
There are no colour markings in the schematic, it’s not important.
Mounting onto the sewing machine
An external motor is mounted behind the main column using a special bracket. Most motors have two mounting screws in a row on the side where the axis comes out, such motors take a straight bracket, of which there are many interchangeable variants. Some motors have mounting screws in different places, so they need their own brackets to match those screws.
All of those brackets however mount onto the same place on the sewing machine: where you also can mount a hand-crank. It’s a ridge with a hole with a bolt under the balance wheel. The ridge fits into a groove on the bracket keeping the motor vertical. Some early machines were only sold with a treadle, so they don’t have such a mount point. It can be made, but you’ll need to be creative since you haven’t got the ridge.
I forgot to take a picture without the belt. 🙂 But you get the idea!
Old machines work very well with a rubber motor belt. It stretches and gives a good grip. It goes over the groove on the balance wheel that normally takes a treadle belt.
But before you can attach the belt to the motor, you need to mount the pulley. Simply slip it onto the shaft but don’t tighten the screw, as you will first need to determine the right place for it.
Adjust the belt tension by moving the motor left and right on the bracket, and moving the bracket up and down on the ridge. The rubber belt should be slightly stretched.
Turn the balance wheel and allow the pulley to slip on the motor shaft and settle in its perfect position. The pulley can go onto the shaft either with the screw collar towards the motor or away from it, whichever is best for your configuration. Tighten the screw.
Testing
That’s it! There is only one thing left to do: plug it in and hold your breath! 😮


 Buy me a coffee 🙂
This was so cool! And I like the kitty too! Sewing machine are just plain magical!
LikeLike
I always thought motors were magical. I mean, you wrap come copper wire around a piece of iron, you apply some pencil lead and electricity – and the thing spins???? Come on, that’s magic!
LikeLiked by 2 people
Hi, what happened next, did it work?
I have mixed feelings about SewTric motors – their foot pedals are not very user friendly and the propensity for their capacitors to explode at inopportune moments is a real pain on old UK machines, annoyingly these are fitted right inside the electric motor and are virtually inaccessible without a major strip down.
Enjoyed the article.
Best regards
Ron
LikeLike
Hi Ron, it worked at first, then after a few days the screeching resumed. 😦 I think it is coming from the brushes. I have since learned how to clean the motor inside properly, but have not put the theory into practice yet – that will make for a new post! 🙂
I have quite a few SewTric motors, and I do like their pedals – it is so much a matter of taste! Haven’t had any serious problems with them yet. But I admit to prefer Hillman motors, they seem stronger somehow even with the same size and output rating (50W). They often have the same connectors as SewTric which helps combat proliferation of different pedals under the table. 🙂
LikeLike
Do you know the make of the 4 pin connectors? I’ve got an old Pfaff with a Sew-Tric 4 pin like yours but no pedal. I was hoping to pinch my mums 3 pin singer pedal and re-wire it if I can get a connector!
LikeLike
The make is Sew-Tric as well, although some later Hillman motors also used it. I think it will be easier to just buy a whole pedal – I’ve never seen any connectors offered separately.
LikeLike
Helen Howes may have an answer to your question, she sold me one connector like the one you are mentioning:
she is super nice and very helpful
LikeLiked by 1 person
Thanks for the link – it is a thing of beauty inside. Amazing how someone invented this!
LikeLike
I know, complete magic, isn’t it? When we studied electricity and magnetism in school, I remember the teacher saying that you can make a magnet with an on/off switch by running current through a coiled wire – that being the reason that you must always fully unwind the cable of your vacuum cleaner or it might catch fire. But I could not make a connection between a magnet being created in the coiled wire and the hoover exploding… I did experiment however and switched on the hoover with the cable stilled rolled up inside it – and it got very hot very quickly! 😲 So always unrolling the cable now. 🙂 But again I could not make a leap from that to producing motion. I think if the teacher had actually explained to us how one of these motors worked, it would have all clicked into place back then instead of 35 years later. 😉
LikeLike
hi
that was super helpful
i went through the renovation of one sewtrick motor
however once all was completed and put together again, to my surprise the motor come revving in reverse
i do not know why
any ideas ?
it is AC so no point on swaping the connectors, right ?
LikeLike
Hi Pat, I’m glad it was helpful! Regarding reverse motion of the motor, I haven’t done it myself but was told that if you swap the wires connecting the coils, you’ll get reverse motion. Basically, reversing polarity of the magnetic field switches the direction of rotation.
LikeLike
Thank you
i understand your response, but that is not possible IMHO.
This is an AC motor, hence no polarity whatsoever.
i can not see any AC to DC converter, there is a device but it says “Dubilier, Lead through suppressor”
moreover the renovation cosisted of basically replacing the covers of the cables, the covers were burnt or damaged, but i was very careful to mark all the cables, so i did replace them exactly in their same places,
there is only one detail that i would like to check so i will do this again.
BTW i do have interesting pictures of the process but i can not upload them, i think it might be useful to others dealing with this, regards,
LikeLike
Hello, this has nothing to do with AC or DC. AC motors also have polarity. I was not referring to the wires connecting the motor to the outside world but internal wires connecting the coils to the starter. There are many answers on the internet, try for example these: https://www.groschopp.com/how-to-reverse-ac-motors/ and https://electronics.stackexchange.com/questions/253867/reversing-direction-of-an-ac-universal-motor
Your experience sounds interesting, why not write your own blog? This is how I started too. 🙂
LikeLike
i see
your explanations (links) were helpful, elena
surprising that changing the cables to the coils would do anything to change the spin sense
i have an additional response to this, and yes i have solved the issue (will tell in my next message)
i have no intention to start a blog, i would like to complement what you have done here so you will have a broader wikihow about the sewtrick sewing motors in one place (sewtrick motors are such a rare thing that makes no sense to spread the knowledge, your blog was very helpful as virtually nothing else arose in the www)
again, i can provide you with useful pictures (it seems that i can not link them here unfortunately)
basically the process of replacing the burnt cables, and cleaning and regreasing,
my sew trick is virtually the same as yours, but dedicated to viking sewing machines and so painted in the same colour of the machine (light green)
BTW, i think that your rotor coil end is too much inisde and hence your coils are not in the best position (my motor has 4 washers in that end and yours only 2), i can tell from the pictures that that rod end is not sitting properly on the bushing, and that the coils are far from the drum center)
pictures can help explaining this, but again i can not upload them here
let me know if i can help
LikeLike
Thank you Pat, and I am glad you solved your problem. Sew-Tric motors are quite standard brushed AC motors. My motors are working fine, thank you. The important bit with respect to the position of the rotor is of course that the brushes must make full contact with the strip. Different models of these motors had different lengths of the rotor axis, and it seems that yours is a little different from mine. And this is exactly why I only write about what I have observed myself so that I can answer questions first hand. Thank you so much for wishing to contribute though.
LikeLike
so how did i first created the problem (reverse spin) and then solved it …..
i am used to repair old machinery, so documentation is key
first thing i did was to test the motor, and it was spining correctly (anticlockwise), but was very slow
i dissasembled all the internals, marking each connection and cable, this is relevant because to remove the coils you have to remove soldering
cables were rotten (my guess is that cable covers were silicone) burnt or else, i decided to change all internal cables with brand new (120º C rated flame retardant) cables, so did all according to the marking to avoid any mistake
finally new cables were a lower gauge (thicker) so was difficult to manouvre inside the motor and it happened that the whole assembly ended up rotated180º (i noticed this because the iron core had two marks from the lateral screws)
i gave no importance to this detail, and then the spin was clockwise 😦
so, easy, instead of changing the cables i turned the core 180º and, alas ! correct spin
i also put a dab of Moly grease in both motor bushings, and special care to the number of washers at both rod ends
regards
LikeLike