I know I promised to get on with my Shivering Isles dress and do those fancy sleeves, but life interfered again: in 11 days we are going Subaquatic! And that requires an outfit, obviously.
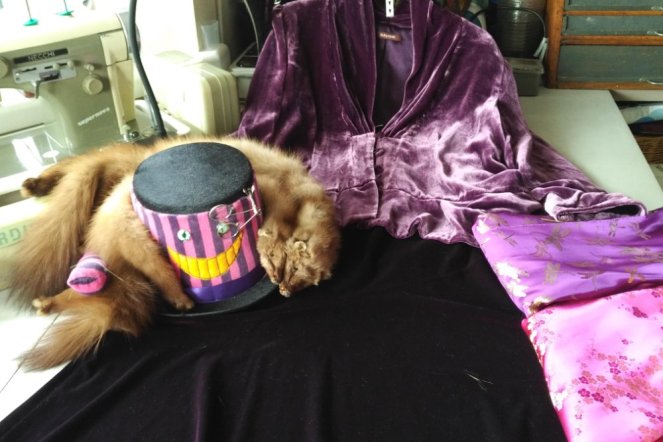
Plus, I finally figured out what to do with my purple outfit featuring The Cat:

I mean the cat on my head, not the person next to me. 😁
I have these two pieces of Chinese brocade in exactly the right colours to match the stripes on the hat:
As I mentioned earlier, I’ve had this all for a while but couldn’t quite figure out what to do with it. I have now! 😀
I’m making a long sleeve blouse out of the darker brocade with a tulip collar and a reverse, all edged with a ruffle made of the lighter brocade. This will be worn over the velvet skirt. Then on top of the blouse I’ll be draping a short overskirt with the two brocades, dark over light, with a draped bustle at the back. No boned shell, just drape. The velvet top goes over the brocade blouse so that the overskirt and the bustle would come from under it.
I’m using this pattern from 1952 Praktikus Modenblatt:

It has clipped kimono sleeves and a double collar. All I have to do to turn the top collar into a tulip, is to give it a small round point and wear it standing up. I’ve sewn this pattern before and this is what it looks like:

The only thing to change here is to convert the horizontal bust folds into darts or vertical folds of some sort because I am not that keen on them as they are.
I am edging both collars and sleeves with a ruffle. Since I don’t want the reverse of the fabric showing, the ruffle needs to be doubled up, with a fold line along the edge. This means two layers of Chinese brocade gathered up – that’s pretty thick!
To thin it out a bit I’m using a spiral volant instead.

As you can see, this is a spiral where the main band is double the width of the finished ruffle-volant, plus we have the seam allowances on either side of it. Because Chinese brocade frays very readily, I’m leaving large seam allowances just to be on the safe side – they can always be trimmed later.
In general, a spiral volant is a very fabric-efficient way to make a flounce with very few seams. Beware however that the curvature is not even everywhere, but usually it doesn’t matter, as also here.
The long side of the spiral is gathered such that it becomes roughly the same length as the short side.

Gathering can be done easily by setting your machine to the longest stitch and increasing top tension. More tension makes more gathers. It doesn’t have to be precise because you can adjust it later.
Once gathered, I fold the band length-wise and stitch along the edge. One side is gathered, the other is plain.

This ruffle can now be used for edging.
And here it is on the collar:

This top was meant to be a part of a dress with the front opening purely decorative – everything was meant to be stitched in place. But I wanted to use the front opening, and so got myself into a bit of a fudge. In the blue floral top from the first time, I made a proper full opening and had to resort to invisible poppers for the inset – a button was just not holding the collar in position. (According to my college tutors, if you have to resort to invisible poppers or hooks, your pattern design is flawed. Points off your work! 😳)
So the second time around I decided to be clever and stitch the inset in place as intended, but from there to make a working opening. You’d slip the blouse over you head and button the front. Great idea! Except that now I got myself the mother of all complicated sewing constructions! It took me the better part of the day yesterday to get it sorted. 😲

The left pink inset with the reverse collar is stitched to the main pane and to the right inset forming a square corner at the bottom. The reverse needs to be flipped open because the ruffle has to be sewn in, the same as at the shoulder. On the inside everything is covered by the inset facing.

Here you can see the upper collar being wedged between the inset facing and the reverse facing, but on the back there is no facing, so the collar finishes off the neckline. The purple front closure with its facings is completely symmetrical as it comes off the point – it can be laid out right on top or left on top.
“Anita, brace yourself.” Anita is my Singer 27K sewing machine named after my great-aunt who was an accomplished dressmaker.

“What are you up to now, girl?” I’m her junior by about 70 years, so of course she calls me “girl”. “Stitch over eight layers of brocade with interfacing, then drop down to two layers as if nothing happened? Yes, I can do that, of course, but aren’t you getting ahead of yourself?” She’s a bit condescending, this one. “And I need a drink!” Yes, don’t forget the drink – the previous owner kept her high and dry for a few decenia, you’d think we had Prohibition for sewing machines. And anyhow, old ladies like their drink – for medicinal purposes only, you understand. “These young designers always complicate things.”
“We are sewing a 1952 pattern.”
“Like I said – young designers! That’s when I got my new dress, too.”
This double collar with the inset and the two front facings was an exercise in basket weaving: put two layers together, stitch; add two more layers facing in the other direction, stitch; add another layer, stitch; etc. Don’t forget to flip open the reverse! Ah, forgot – unpick and start again. Definitely getting ahead of myself! Change thread every time: pink over, purple under; purple over, pink under; both threads pink; both purple. Why change thread? Because the wrong colour always shows in an open seam, and I couldn’t predict straight away which of the seams would be showing.
Another complication was with the fusible interfacing. Brocade moves! It snakes and shifts in all directions even though it has no stretch in it in the conventional sense. But the interfacing wouldn’t stay put, so I had to sew it on in places like a non-fusible interfacing.

Lesson learned: use stretch interfacing with brocade.
Ruffles at the wrists, buttons on and the top is done! This is technically a double-breasted top, so in order to keep the inner pane from flapping about, I’ve sewn little internal buttons onto the dart fold to close with thread loops.

And there we are, a basic outfit modelled by the lovely Mathilda:

I must admit, it fits me better than her (may be because I’ve got arms 😉). There will be other additions and accessories, and obviously the hat, and some sort of cape because it’s getting cold. I might add another sash with more folds at the back, we’ll see. I was going to wear my velvet blouse over it, but I think the dragonflies are just too cute to cover up. 😀
So, that’s my weekend. What have you been up to lately?

Gasp! You are so amazingly talented! The Brocade is beautiful!
LikeLike
Awww, thank you! 😀 I must admit, it turned out better than expected!
LikeLiked by 1 person
I really enjoyed seeing how you did the ruffle; although the other features you did were clearly more complicated. The finished top is very cool. Anita is lovely and looking fabulous for her age.
LikeLike
Thank you! 🙂 I think that ruffle method can be useful in many situations where you want to use the same material and so can’t have the back of the fabric showing.
LikeLike
Yes, definitely useful, and pretty.
LikeLike
Wow! You certainly have more patience than I. BTW, your Anita is a lovely gal. What is she sitting on? Electric, treadle?
LikeLike
Electric. I don’t have room for a treadle and I don’t like hand-cranks – I feel I have better uses for my right hand than to turn a handle. :-p So it has to be electric.
LikeLike
If all machines sit in the same treadle table as mine do, it takes no more space for treadle than electric. Swapping treadle machines does take time though. That’s OK for me, as fiddling with the machines is part of the fun. I know your range of machines is there to get the best sewing result in the shortest time – so I can see minimum time swapping machines is important – as is having both hands available – hence electric is best. Perhaps you could describe a bit more detail on your standardised plastic bases and speed control setup for speedy swapping one day?
Dan H
LikeLike
That’s a good idea to write up the setup – I’ll do that! A treadle takes up quite a lot of room, what with the drawers and its side table. It’s a good size sewing workstation but my room is too small for it – you’ve seen it! That bay window with its odd corners just complicates things. My current sewing area is also smaller than what I would get on a treadle, but it just about works. For larger projects I have to use the dining table with a table-top machine. But I’ll do a post with diagrams to make things clear. 🙂
LikeLike
GORGEOUS! 😀 I really loved this post, especially the conversation with Anita. 😉 And seeing you work out solutions to the various problems that cropped up was really helpful, too!
❤
LikeLike
Thank you! I was thinking it might be helpful to someone. As for Anita – this one is rather talkative (and don’t forget the drink). You can hear it in the rhythm – just listen to yours. Some are quiet, but some are proper chatterboxes! 😮
LikeLike
Thank you! I really loved this post, especially the conversation with Anita.
LikeLike
Thank you! I really loved this post. Hope this will be beneficial for many out there.
LikeLike