The vertical oscillating hook design was introduced by Singer in model 15 back in 1895. It is now know as the “standard domestic”, first appearing as side-facing and later as forward-facing. This post is about the older side-facing variant, for the forward-facing one see a separate post.
Are you sure?
Timing adjustment is a method to repair your sewing machine, so first of all: are you sure that it is broken?
If you are having trouble with skipped stitches or thread tension, it is much more likely that something simple is amiss, such as using the wrong needle for the fabric or needing to clean and oil your machine. I have written separate posts for such things, please look under “Maintenance” in the menu at the top.
But if you are sure it’s timing adjustment that you’re after, and this is the correct mechanism type, then read on! I’ve also written about timing adjustments for several other mechanisms, so again – check the menu.
The timing principle
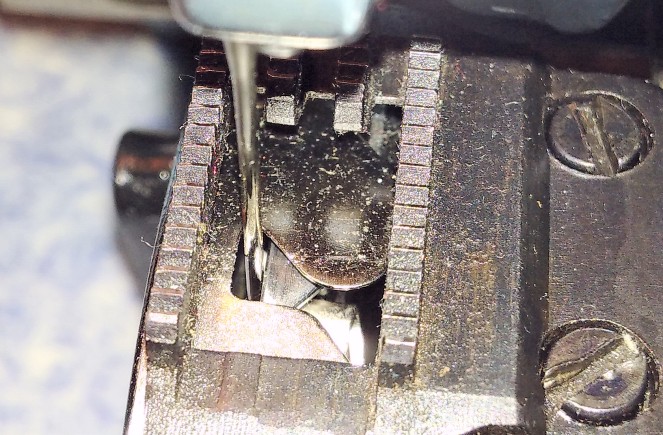
Timing adjustment on an oscillator is based on the same principle as in any other design: when the needle is on its way up, the hook should meet it slightly above the eye, where the needle has an indentation allowing the hook to pick up the thread and form a stitch. Simple. 😉
Timing on side-facing machines is less sensitive to small aberrations than timing on forward-facing zig-zag ones because the latter have to work in a range between the left-most and right-most needle positions, rather than in a single fixed spot. Side-facing zig-zag machines actually move the whole mechanism left and right, so that the needle always meets the hook in the same relative position.
Getting to the oscillator
The oscillating hook mechanism is located under the needle plate, so you need to flip open your machine to get to it.
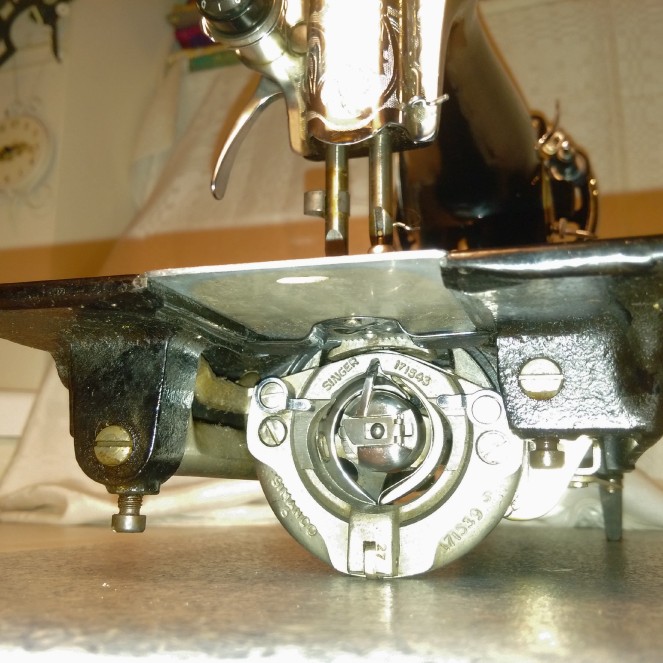
The design of that big metal frame has undergone some changes over the years, even though the hook itself and its operation remained the same. The above photo is from a 1954 Singer 15K110, and it has a fixed surround around the hook that is screwed onto the frame. Later versions would often have a clip-on surround that is easier to remove. Whatever the design, remove it and take out the hook.
The underbelly: straight stitch versus zig-zag
Now turn to the underbelly. The areas of interest are found both next to the hook and on the other end of the shaft. There is some difference between straight stitch only and zig-zag machines. Below is a photo of a straight stitch underbelly, a 1950s Japanese Lion, which is a Singer 15 copy.
There are two areas of interest marked with arrows. On the left, it’s the depth alignment of the driver inside the frame; on the right, it’s the rotational alignment of the driver with respect to the needle.
Both points will have one or two positioning scews that allow adjustment. Or, as in my Lion, those screws are replaced by pins set at the factory and cannot be adjusted any longer. This makes it pretty much impossible to knock off timing on this machine, it cannot slip and get out of alignment. Hurray! 🙂
If your machine too has pins instead of screws but you think that timing is off, then think again! It is most likely not off but something else is the matter. This happend to me – see this post.
On a zig-zag machine the whole hook mechanism and the needle move left and right to produce zig-zag with respect to the fixed needle plate. The left-right synchronisation is achieved through fixed shafts and joints, so it would not be easily thrown off.
Here is what the underbelly of my New Home 580 by Janome looks like:
There may be some differences between machines here, but the important components remain the same, from left to right: a bracket that fixes the frame in place, a ring that fixes the driver depth inside the frame, and on the right end of the driver shaft – a collar that fixes the driver rotational position inside the frame.
The right-hand side is the same as in a straight stitch machine, but on the left there is a new element: the frame is no longer fixed with respect to the needle but can be moved left and right.
Setting the depth
The first thing to do is to set the depth of the hook that determins how close the hook comes to the needle. If it is too far, the hook will miss the thread even if it is in the right position vertically; if it is too close, the thread will be cut.
Put the hook into the race and carefully lower the needle. The depth is set by pushing the entire mechanism along its axis, until the right distance between the hook and the needle is reached. The distace depends on the expected thread thickness. For general sewing, it should be 0.5mm to 0.75mm.
When the depth looks right, tighten the screw to keep the frame in place. Push the driver into the frame (to the right) as far as it will go, hold it in place and push the ring against the frame bracket. Note that one side on the driver shaft is flattened – make sure that one of the positioning screws on the ring lands on that flat bit. Tighten the ring screws and rotate the balance wheel to check the whole stitch cycle.
Setting the timing
Turn the balance wheel as during sewing so that the needle reaches its lowest point and just starts going up.
Rotate the driver in the race clockwise by hand so that the tip of the hook aligns with the left side of the needle. The driver pushes the hook with the lower end leaving a small gap at the top. Turn the balance wheel slightly to bring the needle up so that the hook point is 1mm above the eye of the needle.
Tighten the screws and try some sewing. Make sure you test stitching with the needle left and right to check everything.
If the machine is skipping stitches, repeat the following until it sews properly: loosen the screws on the right, hold the hook in place with your hand and slightly turn the balance wheel to move the needle, tighten the screws again and try more sewing. Persevere and you will succeed!
If you don’t seem to manage proper sewing everywhere, perhaps the depth of the hook is insufficient. Go back to the section that explains how to set hook depth and try again.
That’s it! You are done. Congratulations.


Thanks a lot
LikeLike
Thanks
LikeLike
I was recently given a 1950’s vintage H.G.Palmer Princess (Brother?) Zig-Zag machine. It has the ‘standard domestic’ side facing vertical oscillating type shuttle as discussed in this article. The timing appeared to be way off, so I did my research and went about adjust the timing using the timing marks on the needle bar. However that turned out to be completely wrong (it was way too advanced). I initially thought it had the wrong type of needle (it requires a 15×1 system or equivalent), but after buying a new set of new Schmetz 15×1 compatible needles, I discovered it wasn’t. So I ended up ignoring the timing marks and just set the needle bar height so that the eye of the needle was in the correct position when the hook came around.
So I am left wondering why the timing marks were wrong. Could the needle bar have been replaced at some stage with a part off another machine?
LikeLike
Hi, I have never seen a needle bar with timing marks on a vertical oscillator machine. May be it is something specific to Brother? Or indeed may be the needle bar comes from another machine.
Generally timing marks are not placed on the needle bar itself but on the elements of the needle bar drive.
LikeLike